Your Workshop
Open the CAD app for the first time - learn to orbit, zoom, and find every tool you'll need.
Learning Objectives
- Identify the four core panels of any modern CAD app (browser, ribbon, viewport, timeline)
- Orbit, pan, and zoom comfortably with mouse + keyboard
- Recall the four shortcuts (Orbit, Extrude, Line, Dimension) without looking
- Build a fully-dimensioned LEGO brick from a clean origin sketch
1. Know Your CAD Layout
Lists every sketch, body, and component.
Create, Modify, and Assemble buttons that change per workspace.
Every operation in order — drag the marker to reorder or roll back time.
2. Essential Shortcuts
Memorize these before anything else — they'll cut your modeling time in half from day one.
Four Shortcuts That Cover Early Work
- Orbit (Middle Mouse Drag) — rotate camera around the model.
- Extrude (E) — push a sketch into a 3D shape.
- Line (L) — draw lines in a sketch.
- Dimension (D) — set exact sizes on sketch geometry.
3. Practice Exercise: Model a Lego Brick
Let's put everything together by modeling a Lego brick from scratch. Open Fusion 360, start a new design, and follow each step below.
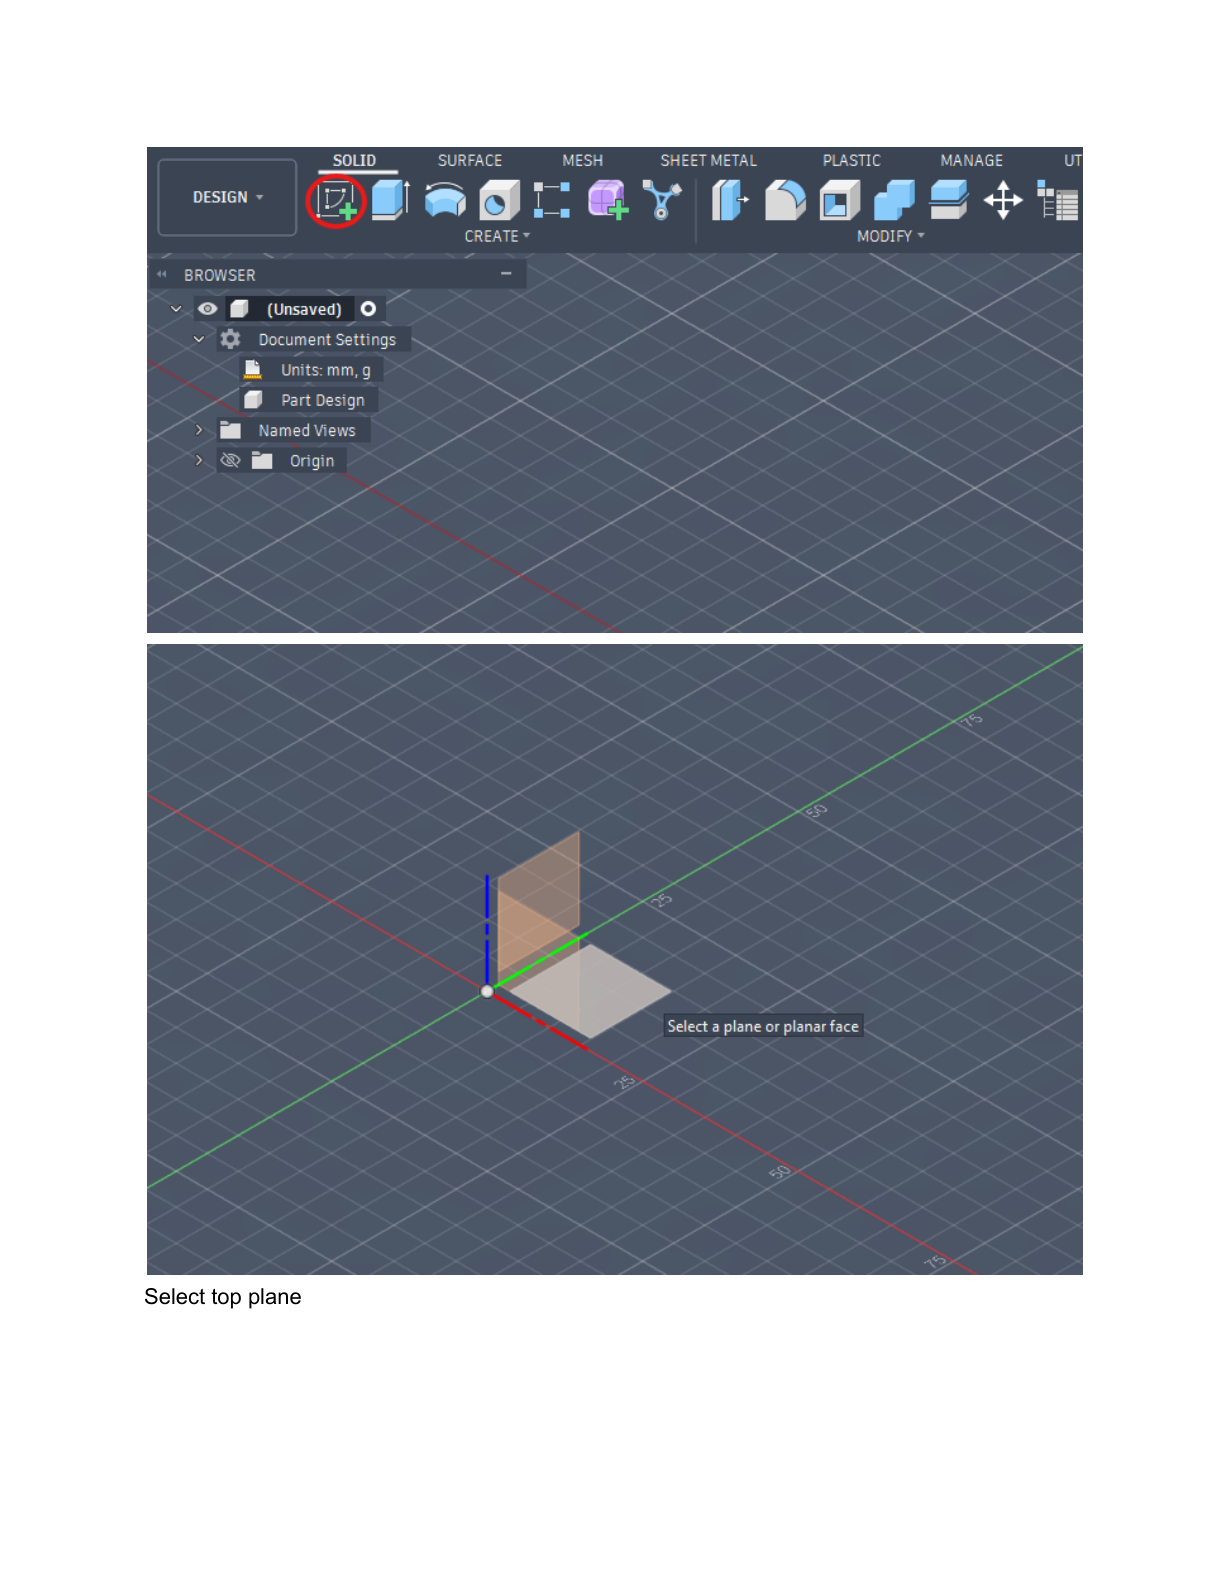
Press S and search for Sketch, or click the Sketch icon in the toolbar. Select the Top plane. Draw a rectangle, then type 20, press Tab, type 20, and press Enter to size it. You can also press D to dimension edges manually. You do not need to type units.
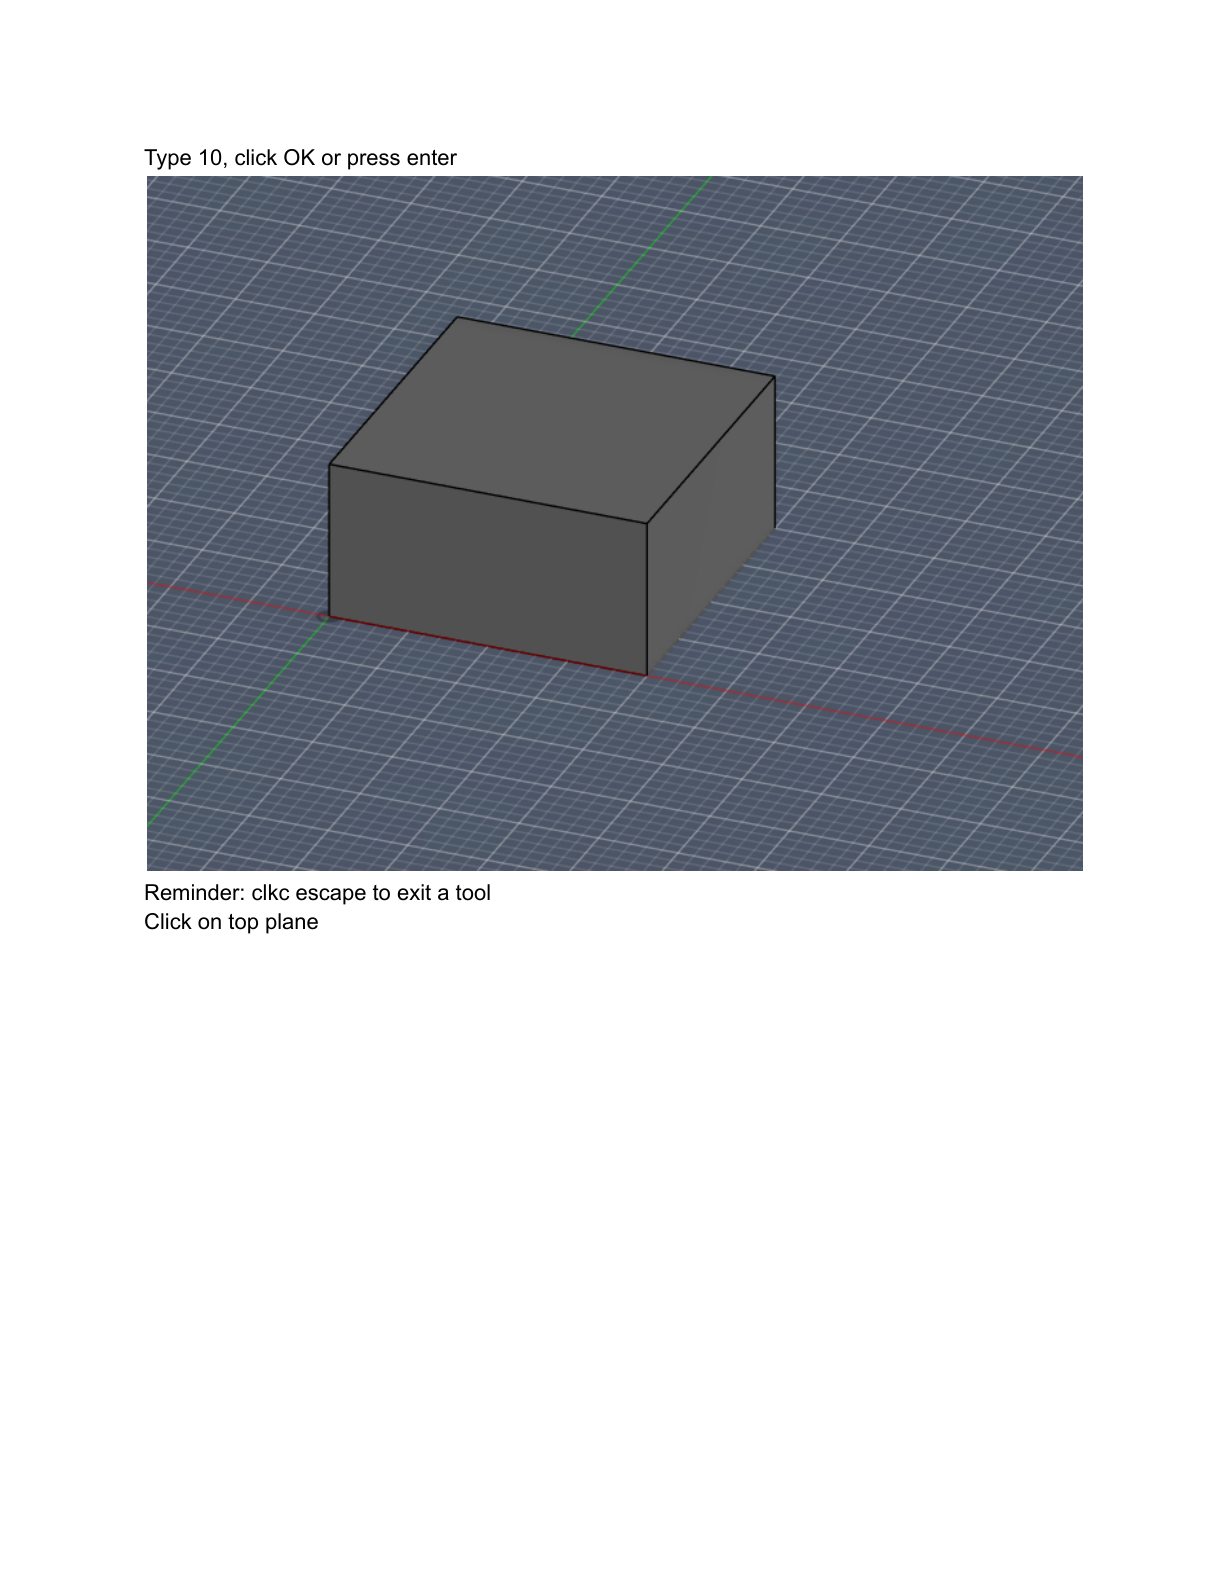
Press E (or click the Extrude icon in the toolbar). The sketch profile should be selected automatically. Type 10 and click OK or press Enter. Press Escape to exit the tool. You now have a solid 20×20×10mm block — the body of the brick.
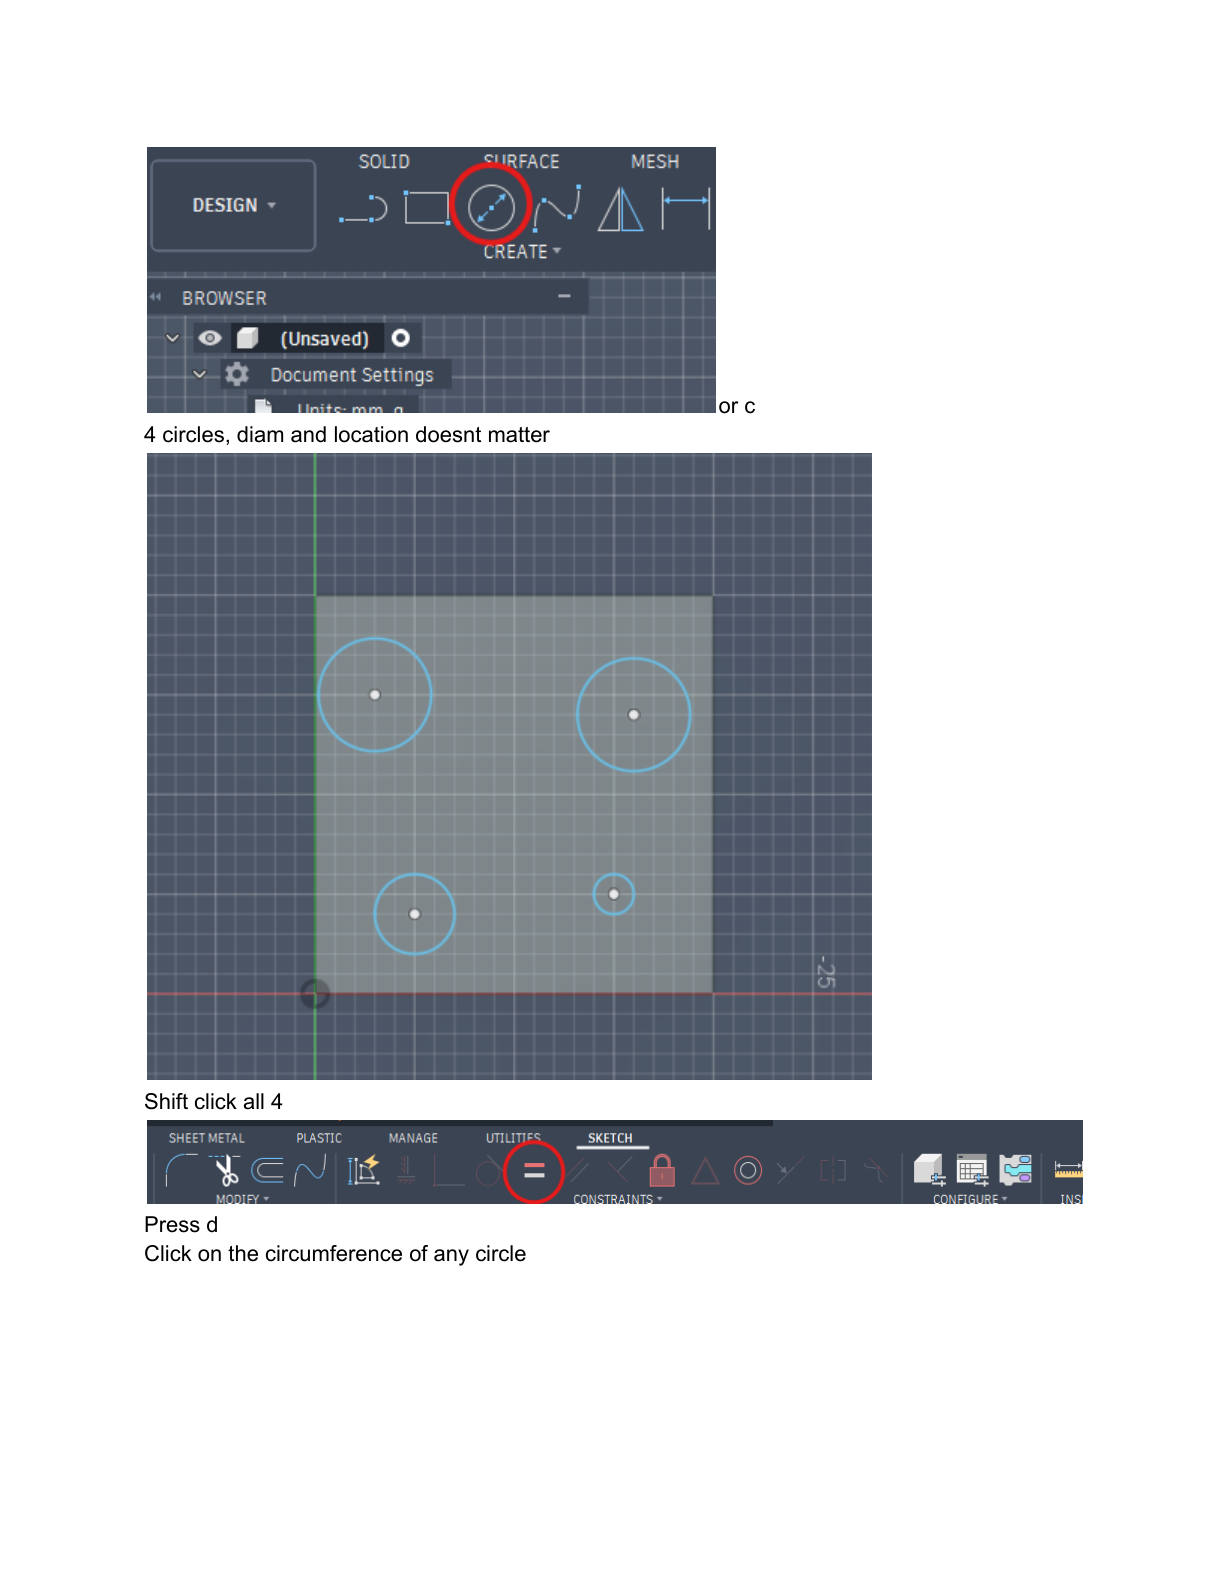
Click on the top face of the block to select it, then start a new Sketch. Press C to activate the Circle tool. Draw 4 circles — diameter and position don't matter yet. Shift-click all 4, then press D and click any circle's edge to dimension them all to 5mm diameter. Then dimension the spacing: 7.5mm between centers, and 5mm from each edge to the nearest center.
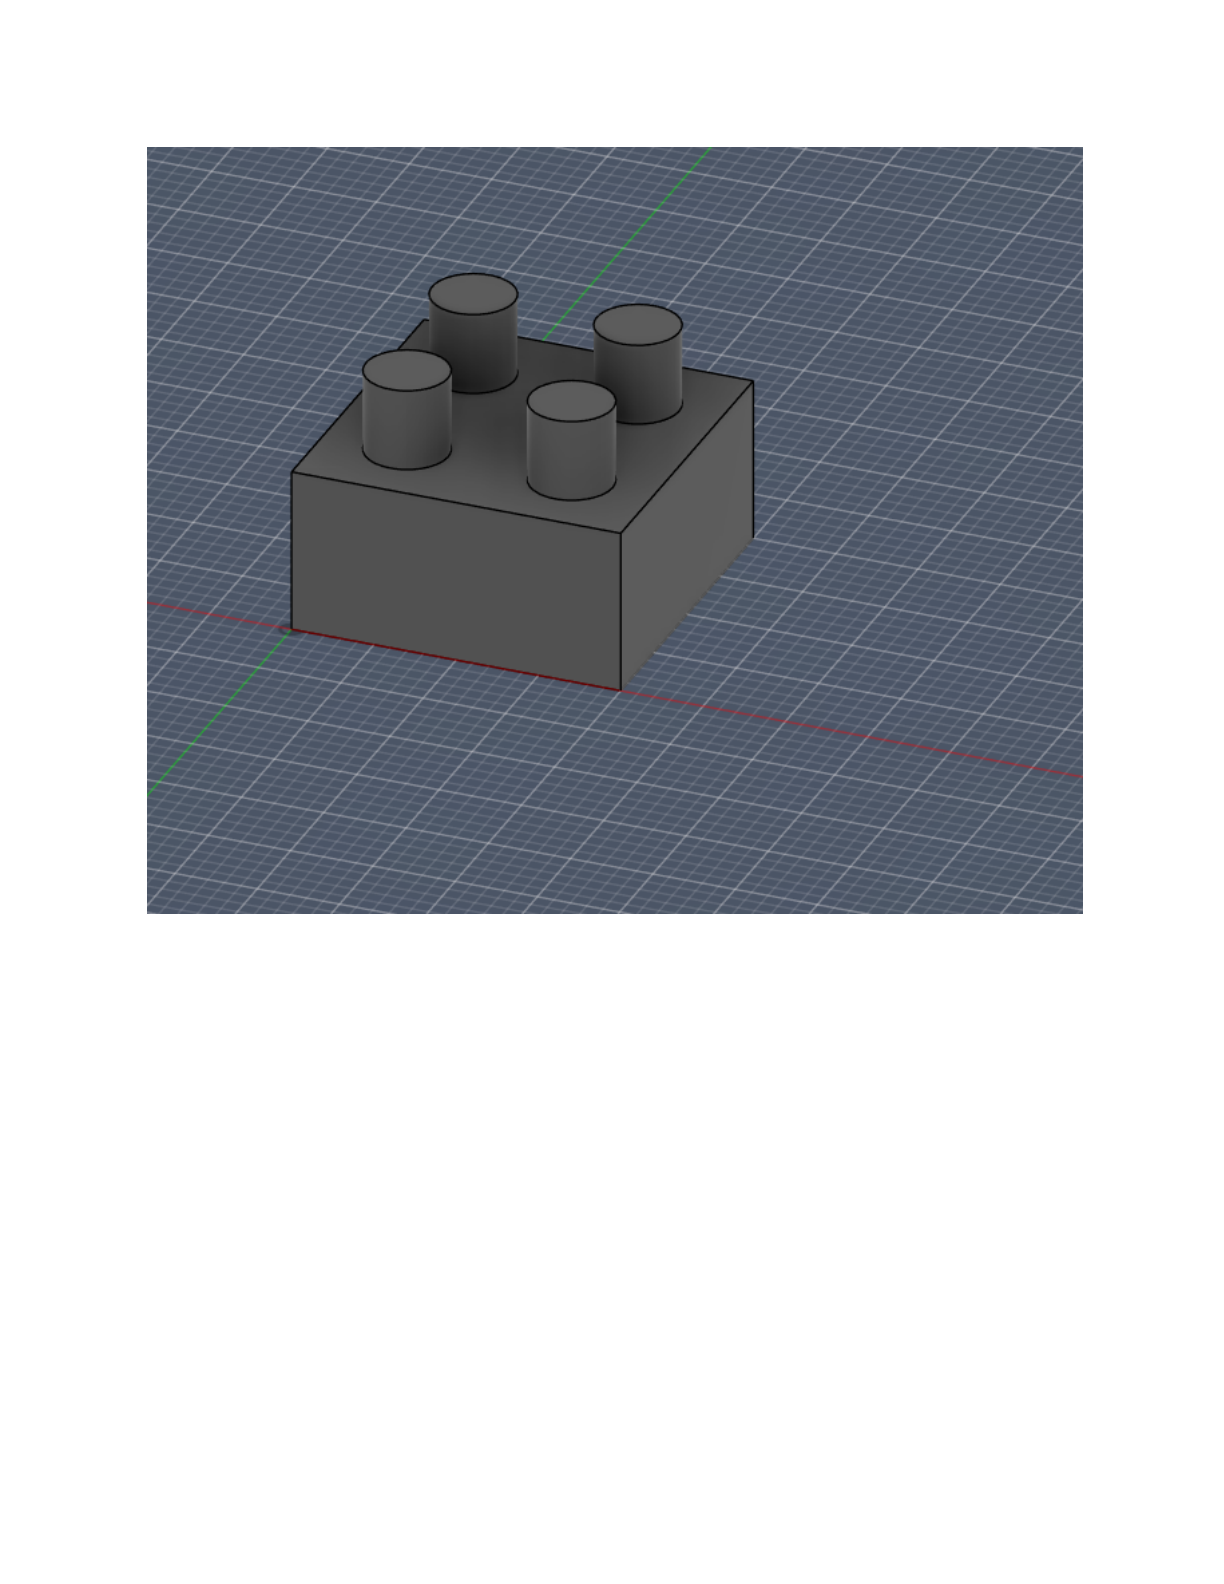
Press E again. Click inside each circle profile to select all 4. Extrude them up by 5mm. Press Enter or click OK. Your completed Lego brick with 4 studs is ready!
If you double the extrusion height, what happens to the volume of the shape?
Extrude pulls a 2D sketch profile along an axis to create a 3D solid.
Key parameters: Distance (how far), Direction (one side, symmetric, or both), Operation (new body, join, cut, intersect).
Volume = Cross-section area x Height
Guided Exploration
- Start with a small extrusion (10mm). Observe the shape.
- Double it to 20mm. How did the proportions change visually?
- Now try a very large value. At what point does the shape look unreasonable for a real part?
Your team needs a simple L-bracket for a robot chassis mount. Plan the modeling steps by checking off each item below.
- Identify which plane you would start your sketch on
- List the sketch tools you would need (lines, rectangles, circles)
- Decide whether you would use one extrude or multiple features
- Consider what fillets or chamfers the bracket might need
Key Takeaways
- Always anchor your first geometry to the origin so the model can never lose its position
- The Timeline is the single most powerful feature in parametric CAD — learn it early
- Type exact dimensions; never drag-to-size for production geometry
- Master shortcuts in the first week or you'll lose hundreds of hours over the season